Copper Kitchen Sink Replacement
Share
Installing a new handmade sink in a kitchen may seam difficult undertaking. But it is not providing you have right set of tools and correct step-by-step instruction. If you have both available, anyone can replace a drop-in sink. Last month while replacing Custom Copper sink we asked a plumber working at our buyer house to offer us advise concerning steps and useful tips that make installation a easy.
But first is first. The following is a list of tools required to do the job right:
- Painter and plumber tapes
- Plumbing putty
- An electric drill
- A hex tool and regular marker
- Standard needle-nose pliers
- Regular wrench
- Screwdriver with multiple bids
- Water proof silicone and gun
Prior to beginning working on your copper kitchen sink shot down the power and water supply. If you are planning to place the sink on the floor while working on it protect your floor with cardboard or any other thick material. Sink metal edges can cause scratches.
As the first step remove water supply lines to the faucet and detach it. If you have a garbage disposal unit remove it as well. Then lift the old sink and clean remaining silicon from the counter usually present under the sink lip. When disconnecting drain and water pipes place a bucket underneath as there is usually quite a bid of water left so you avoid making your work area wet.
Before dropping your copper sink into the counter-top hole cut for the original one, install a drain assembly as well as the faucet so you have less work latter what would require maneuvering in small space of the cabinet below the sink.
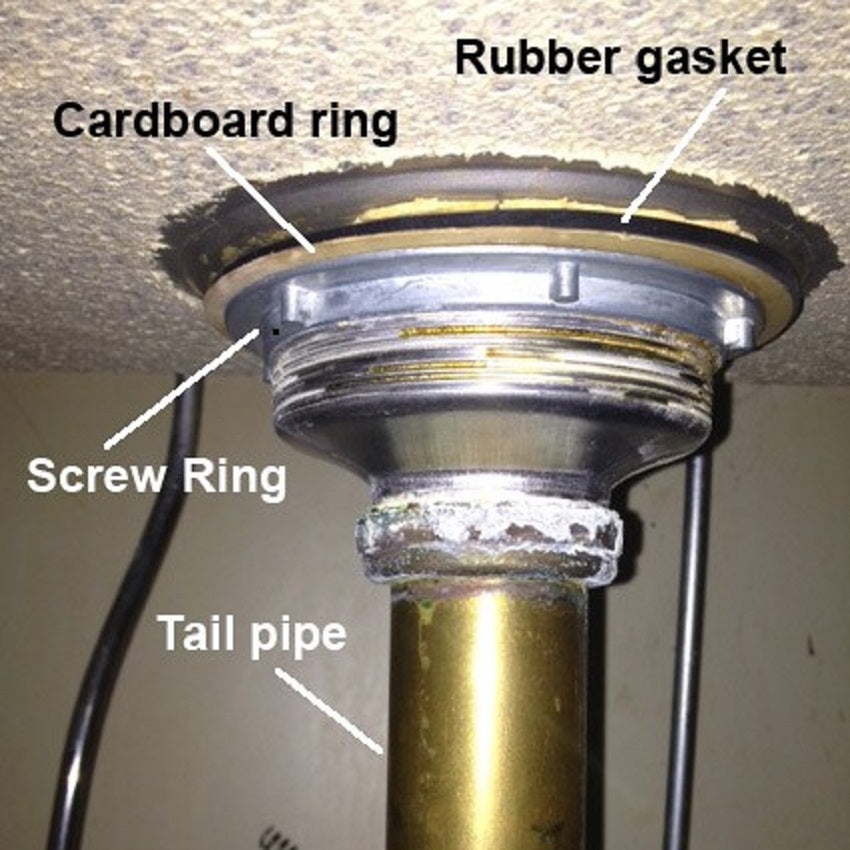
While adding a drain to the sink make sure to use quite a bid of plumbers putty to prevent any future leeks. Use your hand to attach it and then gently finish the grip with a plumber wrench. Using a pair of needle-nose plier to maintain the basket strainer not moving tighten the screw to the point, it doesn't move anymore. If you have a disposal unit it comes with the complete assembly and it has to be mounted prior to placing the apron sink in the counter opening. Do not forget to attach your faucet based on its supplier instructions. The same advice would apply to any water purification equipment if you are planning have one.
Custom Copper drop-in sinks do not come with clips, you need to use silicon to keep the sink in place. Prior to applying silicone to the counter, place it in the opening and use the market to mark location of edges on a painter’s tape. It will make easier to work with silicon and avoid over doing it what may make your job messy.
Once the brand new coppersmith sink is in a correct position reconnect water lines and a drain pipe to the basket strainer. Attach your garbage disposal to the flange while making sue it is in an the right position.

If your new custom copper kitchen sink has no leeks and you can use it, congratulations, you did a good job.
